Thursday, August 25, 2016
Java Calculator Assignment
public class Calc {
enum Op {
ADD("a", "add", "+"),
SUB("s", "subtract", "-"),
MUL("m", "multiply", "*"),
DIV("d", "divide", "/"),
REM("r", "to get reminder" ,"%" );
public String key;
public String command;
public String result;
Op(String key, String command, String result) {
this.key = key;
this.command = command;
this.result = result;
}
public double eval(double x, double y) {
switch (this) {
case ADD:
return x + y;
case SUB:
return x - y;
case MUL:
return x * y;
case DIV:
return x / y;
case REM:
return x % y;
default:
throw new AssertionError();
}
}
}
public static void main(String[] args) {
while (true) //creates loop to top
{
System.out.println("Welcome to Java calculator!");
System.out.println("To add(+) type 'a'");
System.out.println("To subtract(-) type 's'");
System.out.println("To multiply(*) type 'm'");
System.out.println("To divide(/) type 'd'");
System.out.println("To get reminder(%) type 'r'");
Scanner scan = new Scanner(System.in); //sets up scanners
Scanner scan1 = new Scanner(System.in);
String action = scan.nextLine();
Op op = null;
for (Op operation : Op.values()) {
if (operation.key.equals(action)) {
op = operation;
break;
}
}
if (op != null) {
System.out.println("Enter the first number you would like to " + op.command + ".");
double x = scan.nextInt();
System.out.println("Now enter the second number.");
double y = scan.nextInt();
double z = op.eval(x, y);
System.out.println(x + " " + op.result + " " + y + " = " + z + "//");
}
System.out.println("Would you like to start over? (yes,no)");
String startOver = scan1.nextLine();
if ("no".equals(startOver)) {
System.out.println(".......Bye.....");
return;
}
}
}
}
Saturday, July 23, 2016
What is a PAN?
A Personal Area Network (PAN) is the interconnection of information technology devices within the range of an individual person, typically within a range of 10 meters. For example, a person traveling with a laptop, a personal digital assistant (PDA), and a portable printer could interconnect them without having to plug anything in, using some form of wireless technology. Typically, this kind of personal area network could also be interconnected without wires to the Internet or other networks.
Also see wireless personal area network (WPAN) which is virtually a synonym since almost any personal area network would need to function wirelessly. Conceptually, the difference between a PAN and a wireless LAN is that the former tends to be centered around one person while the latter is a local area network (LAN) that is connected without wires and serving multiple users.
In another usage, a personal area network (PAN) is a technology that could enable wearable computer devices to communicate with other nearby computers and exchange digital information using the electrical conductivity of the human body as a data network. For example, two people each wearing business card-size transmitters and receivers conceivably could exchange information by shaking hands. The transference of data through intra-body contact, such as handshakes, is known as linkup. The human body's natural salinity makes it a good conductor of electricity. An electric field passes tiny currents, known as Pico amps, through the body when the two people shake hands. The handshake completes an electric circuit and each person's data, such as e-mail addresses and phone numbers, are transferred to the other person's laptop computer or a similar device. A person's clothing also could act as a mechanism for transferring this data.
Saturday, June 11, 2016
Sunday, June 5, 2016
How to assemble A System Unit
- Motherboard
- Processor & Cooling Fan
- Ram
- Power Supply Unit
- Hard Disk
- VGA Card
- CD/DVD Drive
- Connector Cables
- Casing
- Screws
Let's start to assemble a System Unit
Connector Ports of the Motherboard
- 1st Step - Mount the CPU in the socket of the Motherboard.
- 2nd Step - Connect the CPU cooler to the CPU using Termal Paste.
- 3rd Step - Attach the RAM(memory) modules memory slots in motherboard.
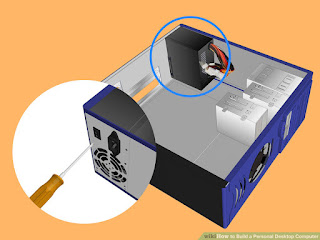
- 4thStep - Open the case and mount the power supply on correct place.
- 5th Step - Attach the Motherboard back plate to the case and check the Motherboard mounting positions.
- 6th Step - Attach motherboard to the Casing by using screws & connect power connector to the motherboard.
- 7th Step - Attach Hard drive to the Casing.
- 8th Step - Attach Hard drive SATA cable & Case swiches, LED connectors to the motherboard.
- 9th Step - Attach Graphic Card to the AGP/PCI slot in motherboard.
- 10th Step - Attach CD/DVD Drive to the casing & connect it's SATA cable to the motherboard & power cable to the power supply.
Now we finished assembling the system unit of the PC.Now we can connect Monitor (Display Device), Keyboard, Mouse & power cables to the system unit & install operating system to the computer.
Wednesday, May 25, 2016
Subscribe to:
Comments (Atom)


